
I had once a requirement that we should able to create a PDF file with the content of a complete (Pages-)library.
So I asked myself:
- How can I print multiple, different pages in one click?
- How can I define or preserve the sequence of the pages?
- I don't want any headers, footers, sidebars, navigation panes etc.
With this tutorial you should be able to accomplish this task. Let's start.
1. Set the sequencing of the pages
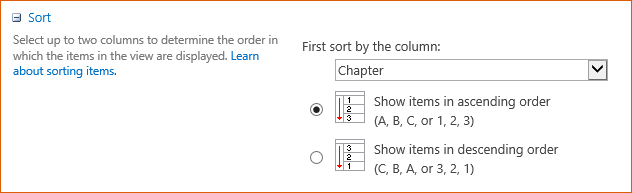
You can order by different field, eg. created or modified date, but I had to set a static ordering by, let's say, "chapter". So I added a new column called "Chapter".


I choose 1 decimal place, so I have more flexibility in ordering my pages (you're able to insert a new page as "chapter" 2.1 or 3.1).
Done that, I change to Quick Edit and set the sequencing. If you don't want to have a page in your PDF export, simply leave the field empty.

2. Create your view
Now you have to create a new view, because:
- You want to have the correct ordering of the pages
- You only want to have the Title and the Content of the page. No other columns.
I call my new view the "Print View".
Choose following columns.
For Wiki Page Library with Content Type "Wiki Page":
For Wiki Page Library with Content Type "Wiki Page":
- "Name"
- "Wiki Content"
For Publishing Page Library with Content Type "Enterprise Wiki Page":
- "Title"
- "Page Content"

Then, sort for chapter.
And if you filter for "Chapter is greater than 1", you will be able to exclude any page you want.

Don't forget to raise the Item Limit!

Now save this view. It will look like this:

Maybe you want to play around with the selected colums. As chapter headers, you could insert a Heading 1 in your Page Content each page, or you can use the "Name" or "Title" column as chapter name. It depends on your requirements.
3. Insert the print function
Take this script and save it to your Assets/Style/Scripts-whatsoever-Library.
Now open your Print View.aspx, click on "Edit Page" and insert a Content Editor Web Part.
 |
| Set the content link of your content editor web part to the script |
For the "Site Pages" Web Part you have to disable the Toolbar Type ("No Toolbar") and the Chrome Type ("none") as well as the view selector menu, the "save this view" button and the search box.


 |
| Adapt those settings |
Now, if we haven't forgotten anything, you get a nice clean page you can print as PDF. I prefer Google Chrome, so you don't have any header or footers in your output.

Limitations and Conclusion
So far so nice. But we are talking about SharePoint which is known for constantly throwing sticks between your legs (as we say in German ;-).
Assuming you have some HTML code in your Page Content, or any Web Parts (HTML Forms, Content Editor) - you won't see them in your view. Our "Print View" only shows you the text content or images, but no web parts!
Do you have a better solution? Suggestions to optimize this one? Leave a comment and let us know!


No comments:
Post a Comment